In this article we will show how you to use the previously implemented GraphQL service for Asset Control in a React app to dynamically generate graphs of FX rates.
This time, we will start from the end and show the app first before we then have a look at the implementation.
In any case, you can find the source code here: https://github.com/mhmtio/react-fxrates
The React app in action
The app allows you to select one of EUR, GBP or USD as the base currency and either one or two of the others as the quote currency.
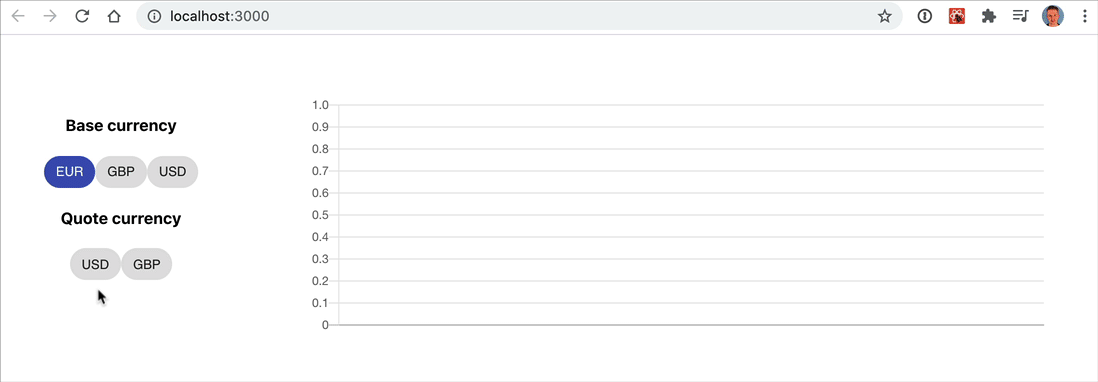
Using the GraphQL service it then fetches FX rate data from Asset Control and displays it in a graph. Neat, no? Let’s take a look at the implementation.
Implementation
Apart from out-of-the-box React we are going to need a few libraries:
@material-ui/corefor the beautiful Chipsgraphqland@apollo/clientto use the GraphQL servicechart.jsandreact-chartjs-2to generate the graphsnode-sassfor a bit of styling
GraphQL client and query
We’ll first implement a client function for our GraphQL service that allows us to retrieve FX rate data given a base
currency in src/ac/ac-data.js:
import {ApolloClient, InMemoryCache, gql} from '@apollo/client';

const client = new ApolloClient({
    uri: 'http://localhost:8084/graphql',
    cache: new InMemoryCache(),
});

export function getBaseCurrencies() {
  return [ 'EUR', 'GBP', 'USD' ];
}

export function getFxData(baseCurrency) {
    return client.query({
        variables: {baseCurrency: baseCurrency},
        query: gql`
            query FX($baseCurrency: String) {
                fxRatesByBaseCurrency(baseCurrency: $baseCurrency) {
                    quoteCurrency
                    timeseries {
                        date
                        rate
                    }
                }
            }
        `
    });
}
To keep our example simple you see that we start out with a fixed set of base currencies. The retrieval of matching FX rates with their quote currencies and timeseries however is dynamic.
You will recognise the fxRatesByBaseCurrency query from our schema in the previous article:
type Query {
    fxRatesByBaseCurrency(baseCurrency: String): [Ado!]
}

...
The FxRates React component
Next we will bundle up the base and quote currency selection as well as the graph under an FxRates component in
src/components/fxrates.component.jsx. Let’s look at the interesting parts of this component step by step. You can always
refer to the complete source code here: https://github.com/mhmtio/react-fxrates
class FxRates extends React.Component {

    constructor(props) {
        super(props);
        const baseCurrencies = getBaseCurrencies();
        this.state = {
            baseCurrencies: baseCurrencies,
            selectedBaseCurrency: baseCurrencies[0],
            quoteCurrencies: [],
            selectedQuoteCurrencies: new Map(),
            fxRates: {},
            tsData: {}
        };
    }

    ...
}
Looking at the state, you can see that we need to keep track of then set of available base currencies, the currently selected base currency (with a default value), the corresponding available quote currencies and the currently selected quote currencies (if any).
In fxRates we will hold the complete set of FX data received from the GraphQL service for the given base currency.
And in tsData we keep the timeseries data already prepared for the Chartjs component for plotting.
We define two constants. One for the colors used in the graph. The other for some options we need for the Chartjs component independent of the dynamic FX data:
const colors = ['lightgreen', 'pink'];

const dataSetOpts = {
    fill: false,
    lineTension: 0.1,
    backgroundColor: 'rgba(75,192,192,0.4)',
    borderCapStyle: 'butt',
    borderDash: [],
    borderDashOffset: 0.0,
    borderJoinStyle: 'miter',
    pointBackgroundColor: '#fff',
    pointBorderWidth: 1,
    pointHoverRadius: 5,
    pointHoverBackgroundColor: 'rgba(75,192,192,1)',
    pointHoverBorderColor: 'rgba(220,220,220,1)',
    pointHoverBorderWidth: 2,
    pointRadius: 1,
    pointHitRadius: 10,
    responsive: true
}
Initial data
To set some meaningful state once the component is mounted we call the GraphQL client function getFxData with the
currently selected base currency and the set quoteCurrencies and fxRates accordingly.
Keep in mind that no graph is shown yet as only a base currency but no quote currency has been selected.
    componentDidMount() {
        this.retrieveFxData();
    }

    retrieveFxData() {
         getFxData(this.state.selectedBaseCurrency)
             .then(fxRates => {
                 this.setState({
                     quoteCurrencies: fxRates.data.fxRatesByBaseCurrency.map(c => c.quoteCurrency),
                     fxRates: fxRates
                 }, () => console.log(this.state));
             });
     }
Selecting a quote currency
Now when we select a quote currency we can actually draw a graph, but first we need to prepare the timeseries data:
    selectQuoteCurrency(ccy) {
        this.setState(prevState => {
            let quoteCurrencies = new Map(prevState.selectedQuoteCurrencies);
            (quoteCurrencies.has(ccy)) ? quoteCurrencies.delete(ccy) : quoteCurrencies.set(ccy, 1);
            const plotData = this.getDataSets(
                this.state.fxRates
                , this.state.selectedBaseCurrency
                , [...quoteCurrencies.keys()])
            return {
                selectedQuoteCurrencies: quoteCurrencies,
                tsData: plotData
            };
        });
    }

    getDataSets(fxRates, baseCurrency, quoteCurrencies) {
        return {
            labels: fxRates.data.fxRatesByBaseCurrency[0].timeseries.map(t => "" + t.date),
            datasets: quoteCurrencies.map((currency) => {
                    const dIndex = fxRates.data.fxRatesByBaseCurrency.findIndex(d => d.quoteCurrency === currency);
                    return {
                        ...dataSetOpts,
                        label: baseCurrency + ' / ' + currency,
                        borderColor: colors[dIndex],
                        pointBorderColor: colors[dIndex],
                        data: fxRates.data.fxRatesByBaseCurrency[dIndex].timeseries.map(t => t.rate)
                    };
                }
            )
        };
    }
In getDataSets (plural, as you can select more than one quote currency, hence draw more than one FX rate),
we assign the dates in our timeseries to the property labels and we generate an array datasets that holds
(for each of the selected quote currencies):
- the constant
dataSetOptsfrom above - a
labelto denote the currency we are plotting - a
borderColorandpointBorderColor(both the same here) and datawhich assigned the rate data from the timeseries
Please also note that via the use of Chips (i.e. toggle buttons) we allow for quote currencies to be selected and deselected. The deselection process is also handled here by merely removing a quote currency from our map.
Selection of the base currency
When the user selects a different base currency, we reset the selectedQuoteCurrencies and tsData, so no graph is
plotted. We also trigger the retrieval of FX rate data given the new base currency to start the process of selecting
quote currencies and plotting graphs anew.
    selectBaseCurrency(ccy) {
        this.setState({
            selectedBaseCurrency: ccy,
            selectedQuoteCurrencies: new Map(),
            tsData: {}
        }, () => this.retrieveFxData());
    }
Putting it all together
Finally we can implement the render function of our FxRates component:
    render() {
        return <div className='fx-data'>
            <div className='fx-selector'>
                <h4>Base currency</h4>
                <div>
                    {this.state.baseCurrencies
                        .map(currency => {
                            let opts = {
                                key: currency,
                                label: currency,
                                color: (currency === this.state.selectedBaseCurrency) ? 'primary' : 'default'
                            }
                            return <Chip {...opts} onClick={() => this.selectBaseCurrency(currency)}/>;
                        })}
                </div>
                <h4>Quote currency</h4>
                <div>
                    {this.state.quoteCurrencies
                        .map((currency, index) => {
                            let opts = {
                                key: currency,
                                label: currency,
                                color: 'default',
                                style: (this.state.selectedQuoteCurrencies.has(currency)) ? {backgroundColor: colors[index]} : {},
                            }
                            return <Chip {...opts} onClick={() => this.selectQuoteCurrency(currency)}/>;
                        })}
                </div>
            </div>
            <div className='chart'>
                <Line height={100} data={this.state.tsData}/>
            </div>
        </div>
            ;
    }
}
You can see how we map over base and quote currencies to display the Chips for currency selection, with logic to
display their state. And lastly we can draw the Line chart from the Chartjs library given our tsData property.
I hope you found that interesting and useful. We tried to keep this article balanced, having a short and simple example while presenting the core principles so you can apply them to your specific use case. If you have any questions, please get in touch or leave a comment. Thank you for reading.