In this article we would like to take you on a quick tour around Adetta and also show you how to create, edit and run tests for Asset Control with it. First things first:
Installation and start
Adetta comes self contained as a zip file that you place and extract at a location of your choice. For the purpose of
this article we assume that this location is ~/adetta. You will also need to place a valid license.key file in the same
directory:
~/adetta $> ls
adetta-gui.sh		adetta.properties	lib			license.key
Adetta keeps tests and necessary resources organized under a workspace and you can configure its exact location in the
adetta.properties file. The default is shown below:
...
adetta.workspace=workspace
...
With this in place, we can go ahead and start the Adetta GUI:
~/adetta $> adetta-gui.sh

  .   ____          _            __ _ _
 /\\ / ___'_ __ _ _(_)_ __  __ _ \ \ \ \
( ( )\___ | '_ | '_| | '_ \/ _` | \ \ \ \
 \\/  ___)| |_)| | | | | || (_| |  ) ) ) )
  '  |____| .__|_| |_|_| |_\__, | / / / /
 =========|_|==============|___/=/_/_/_/
 :: Spring Boot ::        (v2.1.7.RELEASE)

2020-06-03 20:34:39.859  INFO 77320 --- [           main] io.terrafino.adetta.AdettaApplication    : Starting AdettaApplication v2020.1 on mhabook.local with PID 77320
...
2020-06-03 20:34:45.609  INFO 77320 --- [           main] o.s.m.s.b.SimpleBrokerMessageHandler     : Started.
2020-06-03 20:34:45.735  INFO 77320 --- [           main] o.s.b.w.embedded.tomcat.TomcatWebServer  : Tomcat started on port(s): 8080 (http) with context path ''
2020-06-03 20:34:45.771  INFO 77320 --- [           main] io.terrafino.adetta.AdettaApplication    : Started AdettaApplication in 6.99 seconds (JVM running for 8.091)
2020-06-03 20:35:03.704  INFO 77320 --- [nio-8080-exec-1] o.a.c.c.C.[Tomcat].[localhost].[/]       : Initializing Spring DispatcherServlet 'dispatcherServlet'
2020-06-03 20:35:03.705  INFO 77320 --- [nio-8080-exec-1] o.s.web.servlet.DispatcherServlet        : Initializing Servlet 'dispatcherServlet'
2020-06-03 20:35:03.766  INFO 77320 --- [nio-8080-exec-1] o.s.web.servlet.DispatcherServlet        : Completed initialization in 59 ms
We can now open a web browser and point it to localhost:8080.
(You can change the default port from 8080 to something else in adetta.properties if you would like.)
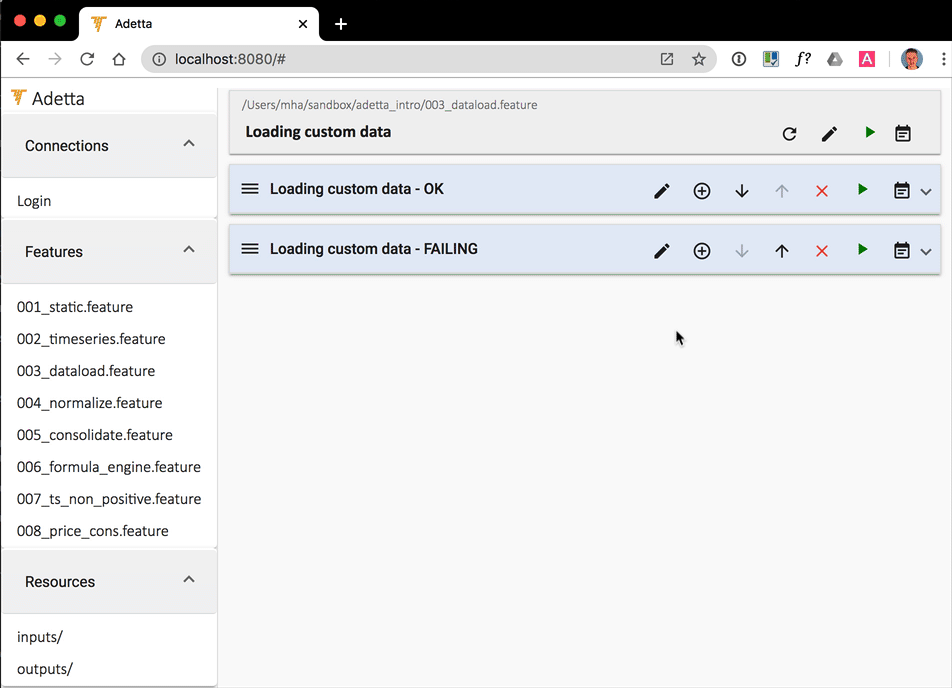
Adetta GUI
Now let’s have a look around the GUI:
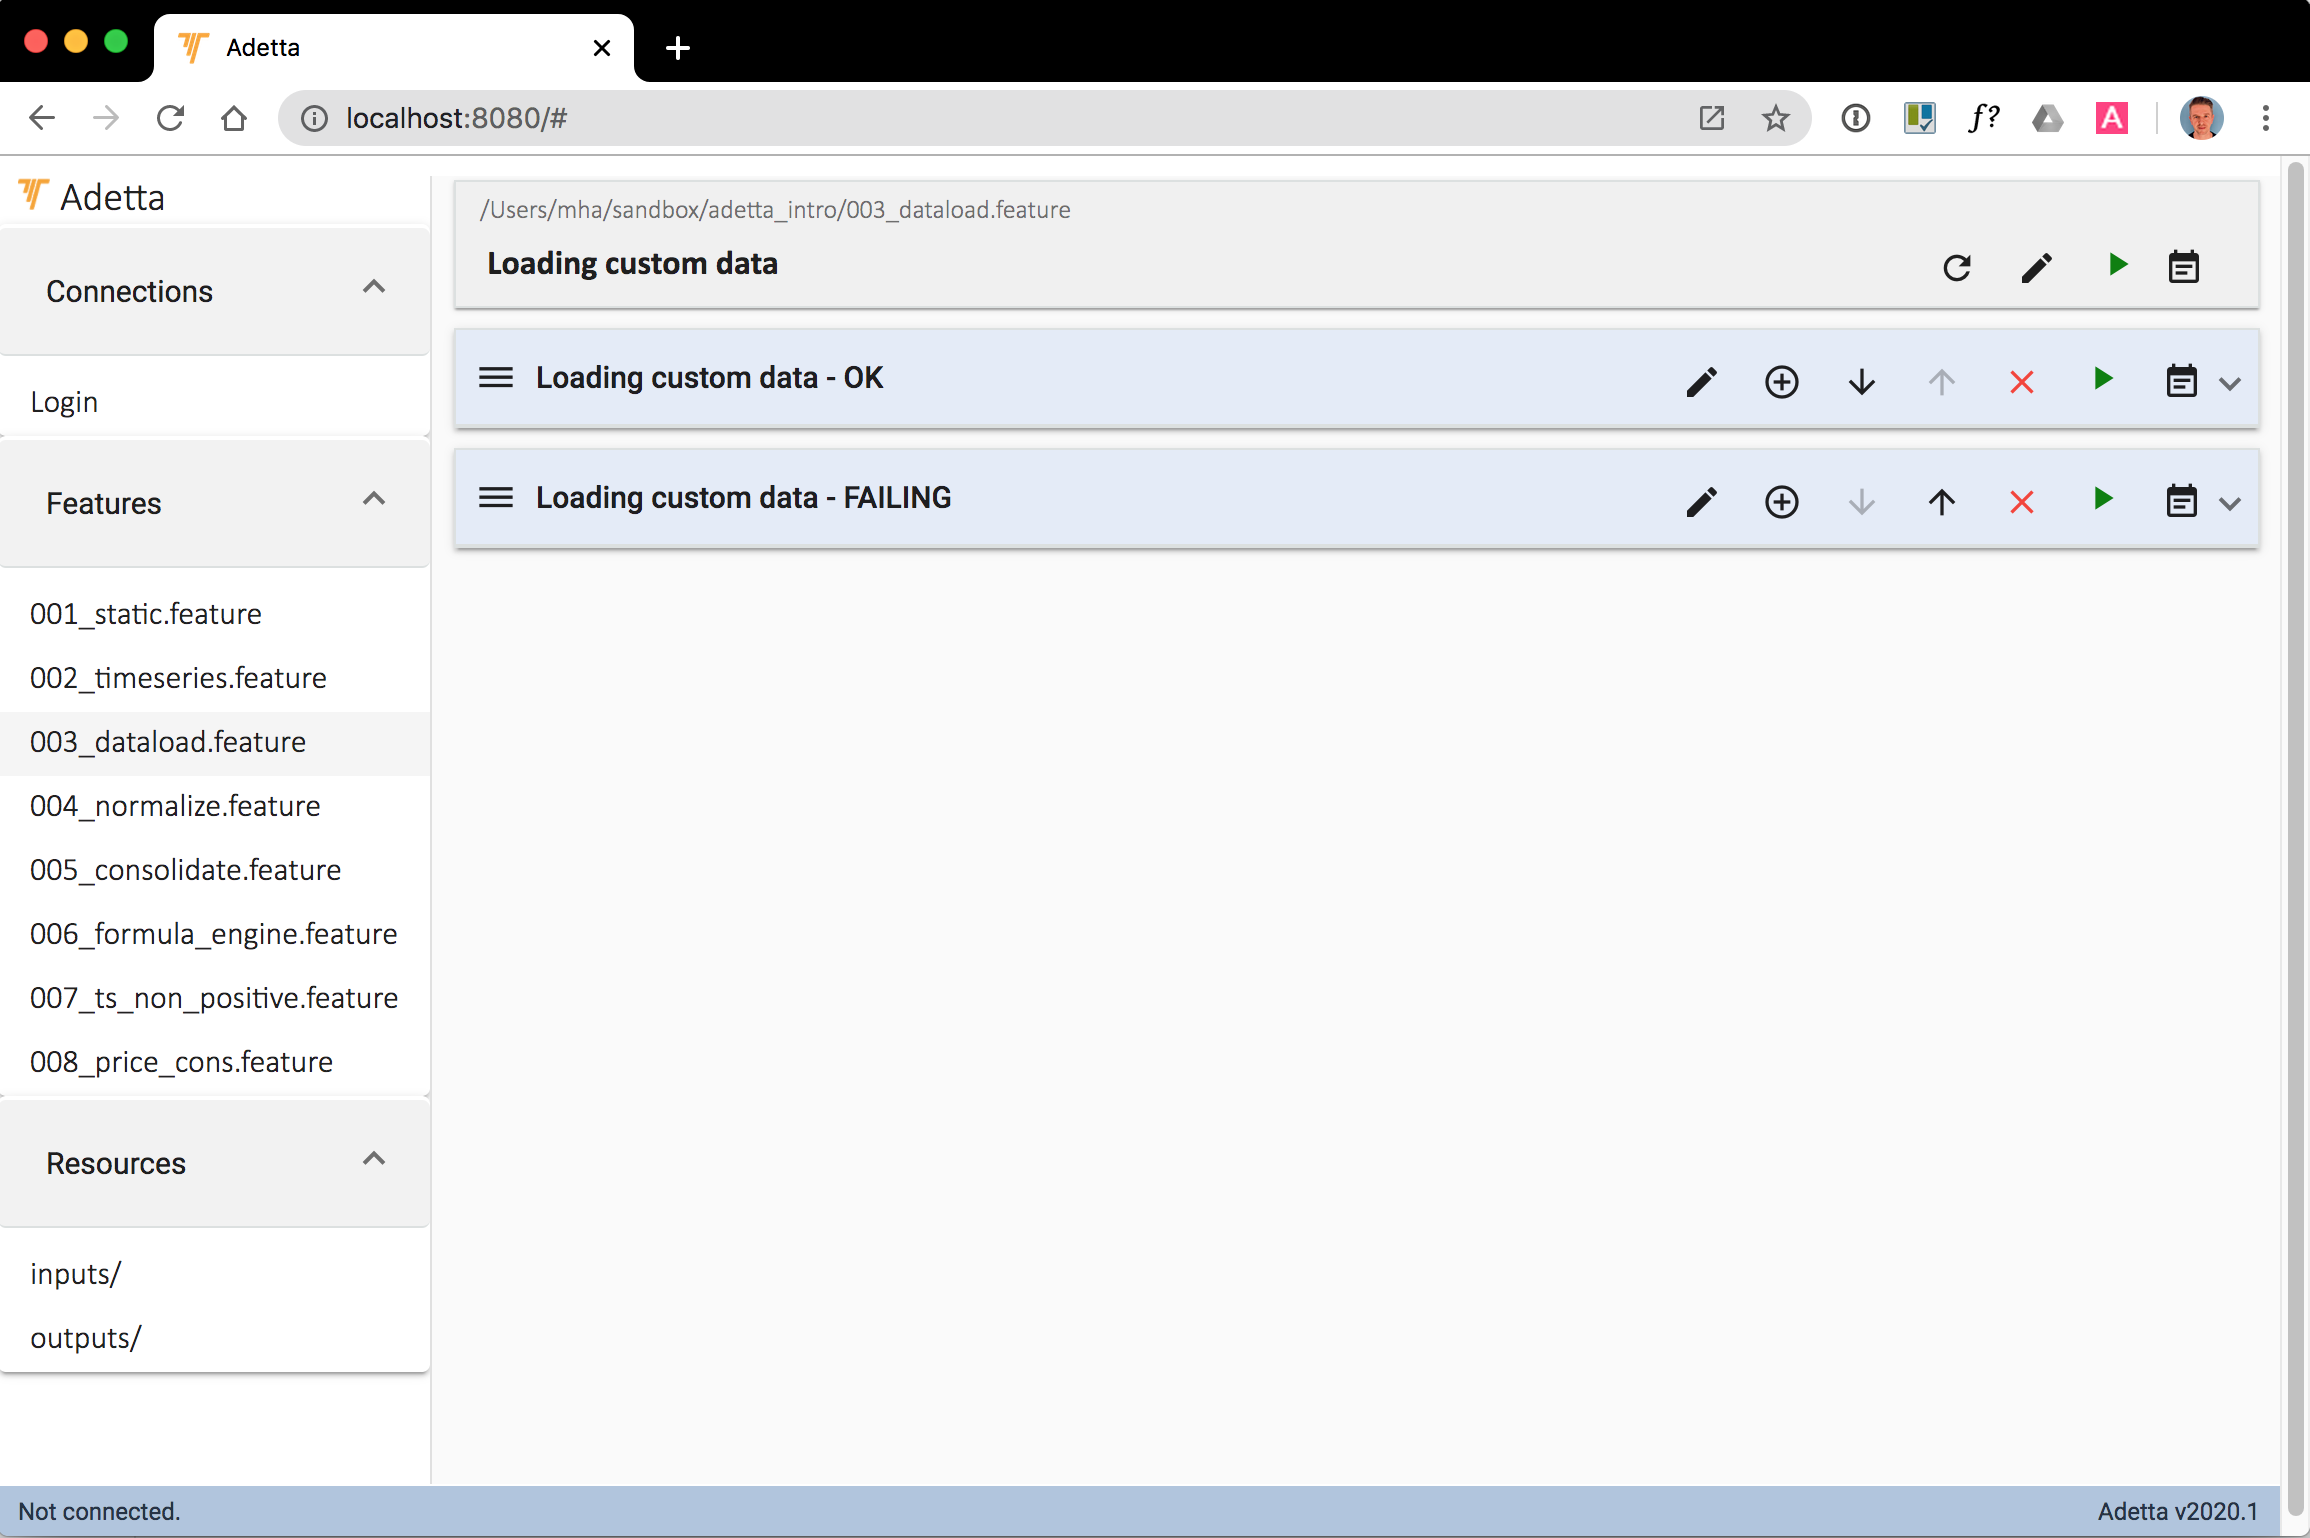
(We are using a previously populated workspace here.)
On the left you see three panels with Connections, Features and Resources. The Features contain any test (sets) you are working on and Resources holds input files, expected output files and similar artifacts used in your tests.
The main panel of the screen holds the currently loaded feature, i.e. a collection of scenarios describing this feature. In the example above we are looking at a feature testing two scenarios of loading custom data into Asset Control. We expect the first one to run OK, but the second one to fail (for demonstration purposes of course).
Login
Before we can run any test scenarios we will need to establish a connection to Asset Control. From the Connections panel on the left, we select Login and the following dialog is shown:
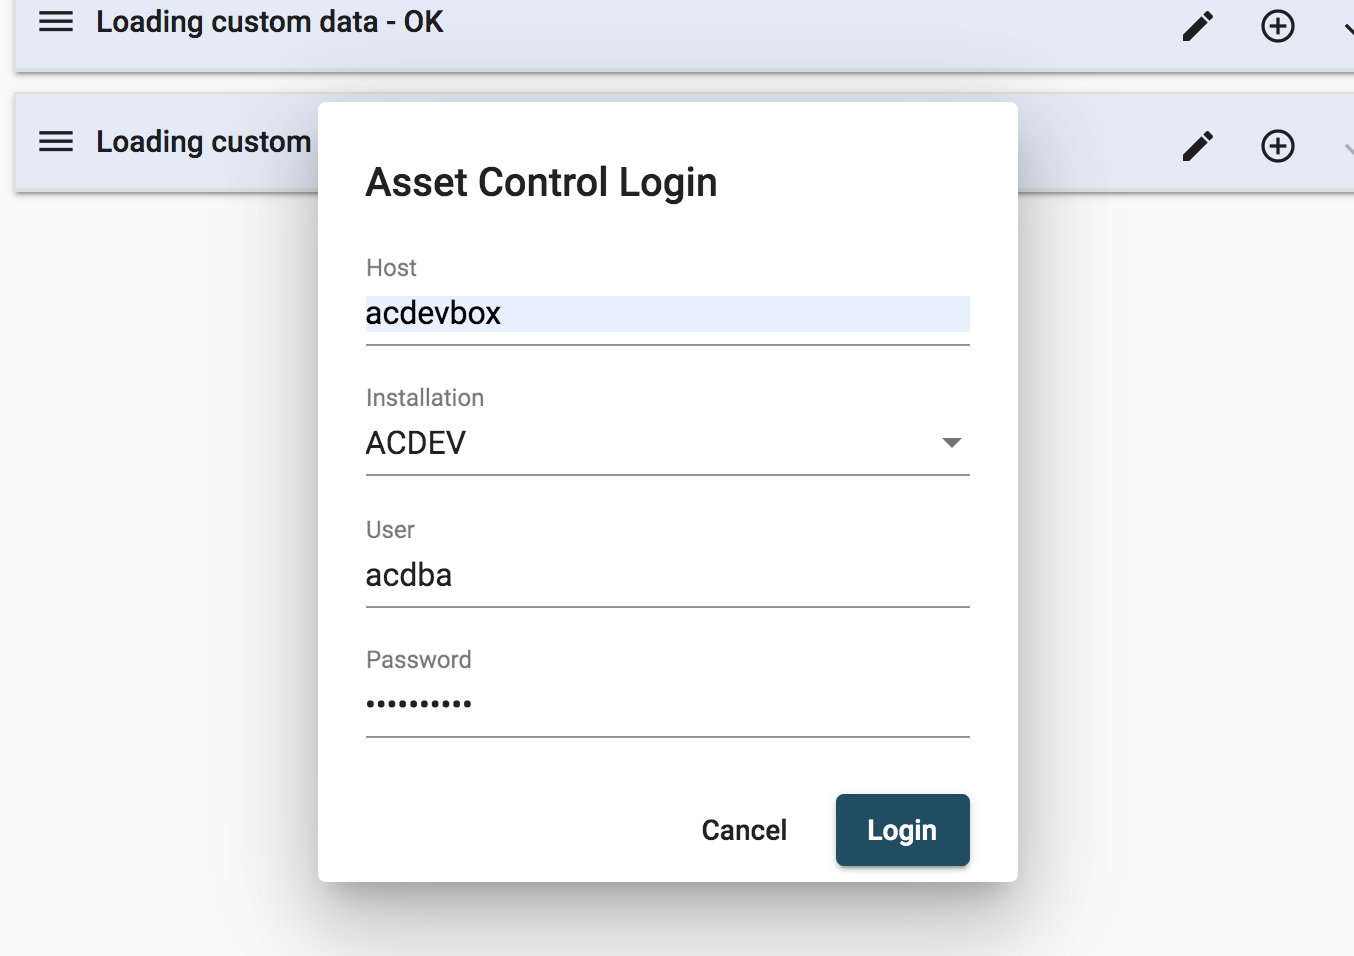
Here you supply the familiar combination of connection parameters. And of course this allows you to run tests against your different development or test environments by changing the connection details.
Running existing scenarios
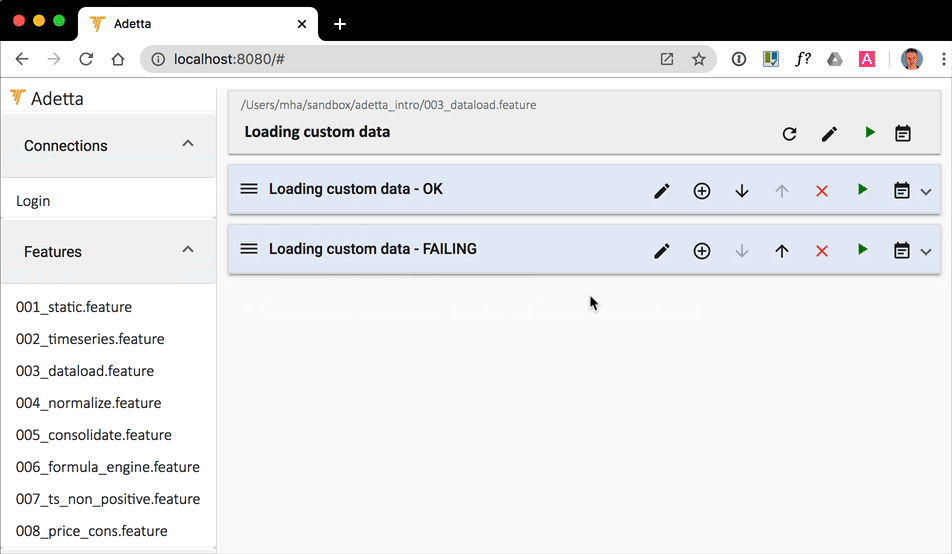
To run either a complete feature or enclosed scenarios individually you first select the feature from the Features panel on the left. This will open the feature in the main panel and display all its scenarios, just like in the screenshot we saw earlier.
Initially, all scenarios are collapsed and you only see their name. Just click on the name to expand them.
Then using the green Run button, you can either run the whole feature or specific scenarios individually:
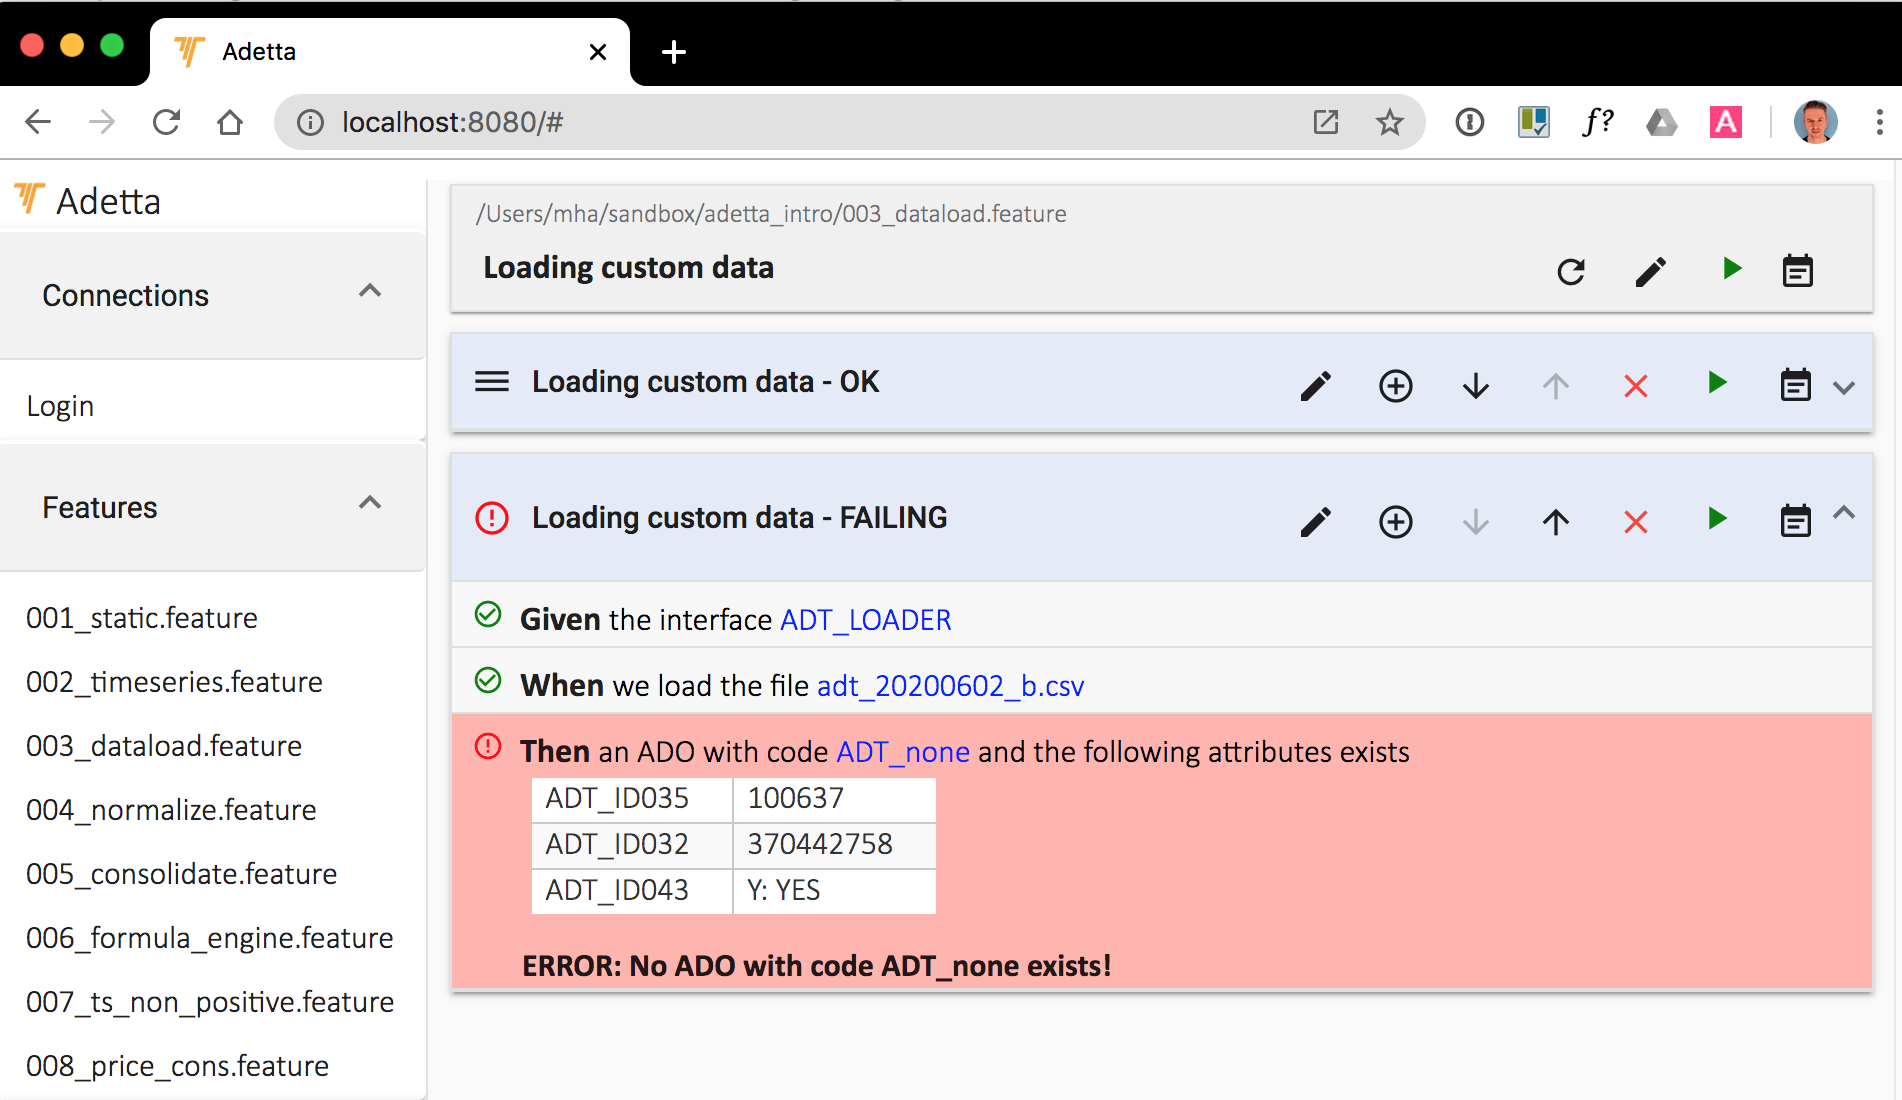
As you can see the GUI indicates the status of the scenario and its steps, e.g. running, passed and of course failed:
Creating and editing scenarios
To create a new scenario you click on the Plus icon of an existing scenario and then select whether you want to create a brand new scenario or start with a copy of the current one:
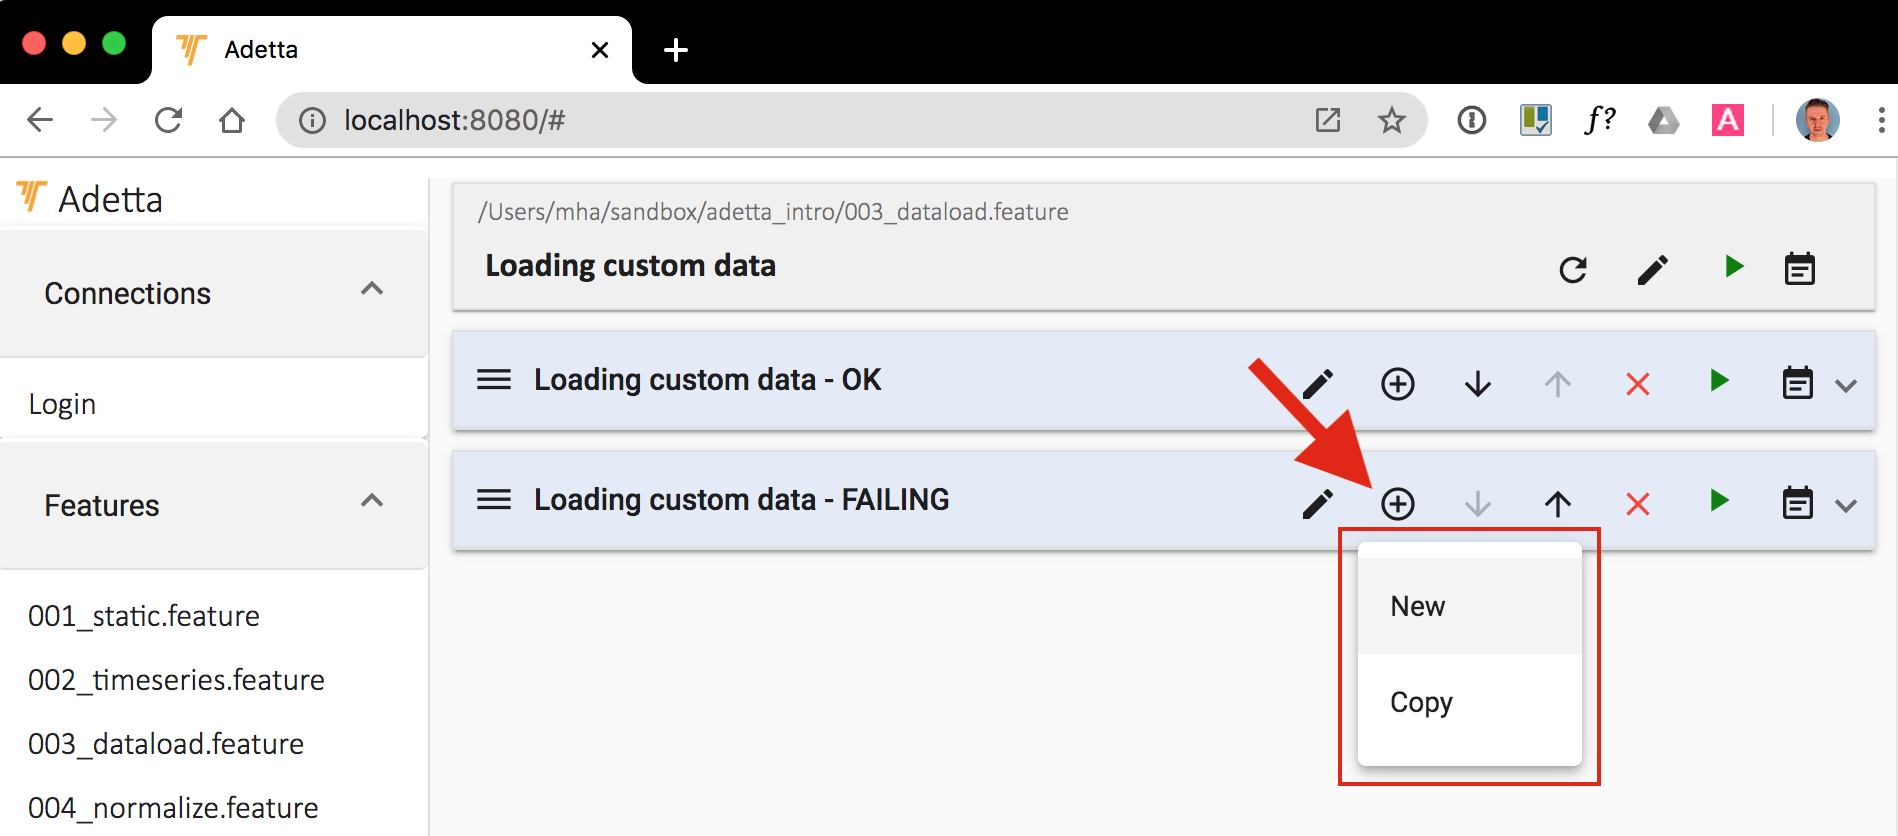
We pick New to demonstrate Adetta’s autocomplete function:
As you can see, you narrow down the available choices of test steps to call by typing a few relevant keywords like interface, load or code and let Adetta guide you. Then you fill in the parameters as necessary.
Of course, there is more to Adetta, so please check back for future blog posts.
Adetta on the command line
The Adetta GUI is the interface we suggest you use to create, edit and essentially test your scenarios and features. For running a number of larger feature sets we would recommend you use the command line. We will look at how to do this in one of our next blog posts.
Integration with your CI/CD pipeline
We are currently working on a Maven plugin to allow the integration of Adetta with your CI/CD pipeline. And we have plans to support Gradle as well in the near future.
Contact us if you would like have more information or discuss support of other build tools. We would be happy to hear your opinion.
Conclusion
This was a brief introduction to Adetta and how to create, edit and run tests for Asset Control with it. We’ll revisit each of these aspects in more detail over the next few articles. For an overview, please see here.